Note: Post was written in July 2014 then left forgotten on the “drafts” pile for far too long. Apologies for that.
With Longest Day 2014 rapidly approaching, and memories of the fun we had with the “deck of cards” shunting game, thoughts turned to some form of operating challenge for those who wanted it this year. Since the long term ambition for the line is to simulate steam age goods operation as realistically as possible, it made sense to try out one of the standard methods keen Ops modellers use for this,either Car Card and Waybill (CC&WB) or Car Tag (wagon label) operation. The American nomenclature is no co-incidence. The emphasis on the larger layout Stateside (the ubiquity of large basements helping a great deal) means that layouts tend to represent lines rather than stations and since the scope for operating is so much greater, more people indulge so there is more trade support (both publications and products) to be had, and anyone looking into modelling ops is going to acquire a degree of familiarity with terms like Boxcar, Reefer, Gondola, and Peddler.
CC&WB is largely paper driven. Every wagon (car) has a corresponding card made from a thin piece of cardboard folded and glued to create a pocket. Upon this is written the vehicle number, type (tpyically using standardised abbreviations), owner, livery (and any other distinguishing marks to help identify it on the layout), and its home station. To “load” the car a small piece of paper known as a Waybill is drawn and inserted into the pocket in the card. The waybill represents a specific load, with a specific destination and will on it the load’s nature (including what type of wagon must be used to carry it), Origin, Destination (usually specifying both a town and a specific industry or facility) and a “next step” instruction. Wagons are marshalled into trains appropriate to load, priority and destination, and worked along the line, and the train crew take the cards with them (yes, crew: some operators find that rostering both a driver and a conductor/guard to this sort of train makes things both more efficient and more fun). Upon delivery the car-card is left at the appropriate station along with the wagon. At an appropriate time (usually the end of the day) someone (frequently the layout owner after the end of a session) checks each card and waybill, and follows the instruction thereon. REMOVE means remove the waybill- the wagon is now empty and should be worked back to its home station. TURN means the waybill has more than one step on it, so should be turned round or over so the next step shows, simulating a wagon that has been loaded or emptied and reloaded and now has a fresh destination. Once this is done, the card is replaced in the pile or box for that station. For added realism some operators maintain 3 boxes for each station; Arrival, Hold, and Departure (with possibly more to indicate direction). Cards are moved down from one box to another at predetermined intervals (simulating how long loading actually takes) and only those filed under Departure are considered ready to go and picked up by the next train travelling in the right direction.
Car Tag operation is altogether simpler, if perhaps a little less realistic. In this case a system of coloured and lettered/numbered tags is designed in advance, with colour and letter codings worked out to give a unique code to each possible destination (both on and off layout). These are applied to the actual model wagons, which are then worked to the correct destination accordingly. It is quick and simple to use, and easy to learn and understand but somewhat less realistic- both from the point of view of simulating real railway operations and from having brightly coloured thingies slapped conspicuously onto nicely painted, weathered and detailed wagons. It does however fulfill the primary requirement for goods operation, giving each wagon and train purpose and a specific destination.
I really like the idea of the CC&WB system, being drawn to its realism, flexibility (regular traffic or one off movements can be simulated, the paper acts as both “memory” and error correction, and once set up it can run virtually continuously with movement seamlessly following movement). It’s something I’d like to try in the longer term, but for now I ruled it out for three reasons. First, wagons have to be uniquely and indivudually identifiable which means numbering them, which means stencils, decals or hand-painting numbers on the lot (and that’s just the home fleet- visiting stock would either have to be individually numbered too or left out). Second: I suspect it would take a little longer to learn- not so good for the casual or once-a-year visitor. Finally, juggling the paperwork in one hand and a transmitter and water topup bottle in the other sounds like hard work, so perhaps not until ops days have enough regular support that we can roster guards.
That meant giving wagon labels a second look. In the smaller scales labels have to be overscale to be visible, and the more information they carry the bigger they have to be. 16mm scale is a different story, and for a comparatively simple railway like mine (by US Basement Empire standards), the information that matters could easily be contained in a scale-sized wagon label (maybe a little bigger for readability). Eventually proper label holders could be made from wire and fitted to the wagons, but for now blu-tac would be good enough (and allow participation of visiting rolling stock). The garden railway has four actual stations (and one more planned) to represent the eight on the Horncastle branch plus the junction at Wragby, so there are nine on-layout destinations. Since both Wragby and Horncastle represent junctions with other (un-modelled) railways off-layout destinations need representing too, both Lindsey Joint and “foreign”. Fortunately narrow gauge wagons travel no further than the trans-shipment sidings so the world beyond Lincolnshire doesn’t come into the picture. Off-layout destinations could be indicated by something as simple as general direction (West, North or East) but I think more detail helps bring the layout to life AND increases the operating challenge- “North” isn’t very interesting but “Blue-Yellow S3=Brumby” brings the railway beyond the garden to life, and gives people a challenge to meet: a wagon for Brumby has to get on the afternoon down Kirton pickup, so has to get to Market Rasen in time to couple to the mid-day Gainsborough mixed or be stuck in the sidings at Glentworth overnight.
After some doodling I decided to try a design using a combination of colours and lettering to pack as much information as possible into a small unobtrusive piece of paper. Each label was 8mm square, with a white circle separating a border from an inner coloured dot, upon which one letter and one number appeared. The whole label indicated a wagon’s destination: border colour indicated company (since six different companies owned by six different sixteen-millers are connected together to form the Lincolnshire narrow gauge network), dot colour indicated for which district within a company a wagon was bound, and the letter/number combination the individual station or industry. Thus a wagon bound for Horncastle would have a blue border (for Lindsey Joint), green inner dot (indicating Horncastle district) and be lettered H8. With hindsight, the H and the green dot both convey the same information, but only experience can tell whether that’s redundant or helpful.
At this point a rough guesstimate of likely traffic levels for each of the line’s stations was needed, so I used population data from an old copy of “Kelly’s Directory” and assumed traffic levels would be proportional to population. Thus 30% of wagons would go to intermediate stations, 40% to Horncastle and another 30% beyond to the WLLR (which actually serves a larger population but also has its own access to the standard gauge network at Firsby- so the LJR Horncastle line would have been lucky to get half the traffic). An appropriate amount of wagon labels for each station was drawn, printed, cut out and dropped in a plastic cup. Rather than select train length randomly, this time we started at Wragby (full of wagons) and assumed a 50-50 split between inward and outward traffic, so labelled every other wagon and let the train-crew loose.
With hindsight, this was a more complex system than the deck-of-cards game and would probably have benefitted from more time setting up and private practice before trying it out on guests.
WHAT WORKED:
The labels themselves were clear and easy to read, so operators had no trouble identifying the wagons they needed and making up trains.
Before the day I had printed out maps of the line and lap-count guides explaining where each station was on the system, and giving its unique label code.
The station layouts functioned exactly as designed, and shunting was practical, logical and realistic.
Blu-tac and paper was a painless way of including visiting rolling stock in the game, without which it wouldn’t have worked. Realism in freight traffic involves at least as many wagons standing around as on the move, so a lot of wagons are needed to simulate those stood waiting to load or unload.
WHAT DIDN’T WORK
The simpler deck-of-cards method only simulated shunting, so it was robust enough to be thrown into the mix of operators and free-for-all steamers at the 2013 event. The wagon label system, being more involved and realistic, was less robust. Shunting goods trains and circulating convoys of steamers got in each other’s way both on the main line and the stations, Horncastle in particular proving impossible to shunt as it was full of dead steamers and their trains.
Due to the haste with which the system was put together, there were a couple of proofing errors that proved both annoying and problematic. The worst was a simple typo, substituting H9 for an intended H8. Unfortunately H8 is the code for Horncastle, busiest station on the line and H9 does not exist. This created some embarassment on my part, and confusion on the part of the operators.
Paper labels are not very weatherproof. Even without rain, the damp of early morning in the shed has caused ink to run and paper to curl, quite quickly rendering the first batch useless.
One limitation of wagon labels is the lack of “what next”. Both sides of the label could be used, or the home station code could be displayed on a wagon (a tricky painting job if the size is to match)
Helpful hands cut up all the labels and put them in a pot. Unfortunately those helpful hands didn’t know the intricacies of the system so labels for incoming and outgoing traffic got mixed up, leading to a lot of scrabbling and discarding to find appropriate ones.
WHAT NEEDS TO HAPPEN NEXT TIME
More proof-reading to eliminate silly mistakes.
Advance sorting of wagon labels for appropriate destinations (EG Horncastle doesn’t need any H8 labels to attach to wagons- why would it send a load to itself?)
More thought to go into the labels themselves. Print on both sides to give cyclic flows of traffic, or empty-in-loaded-out movements. Maybe use different border shapes to indicate load type or empty journeys. Laminate labels for weatherproofing and longevity. Use special labels (eg Red and Green defect cards, special labels for match, runner or barrier wagons).
A more permanent solution to attaching labels to the home fleet, most likely a simple bent-wire label holder for each wagon.
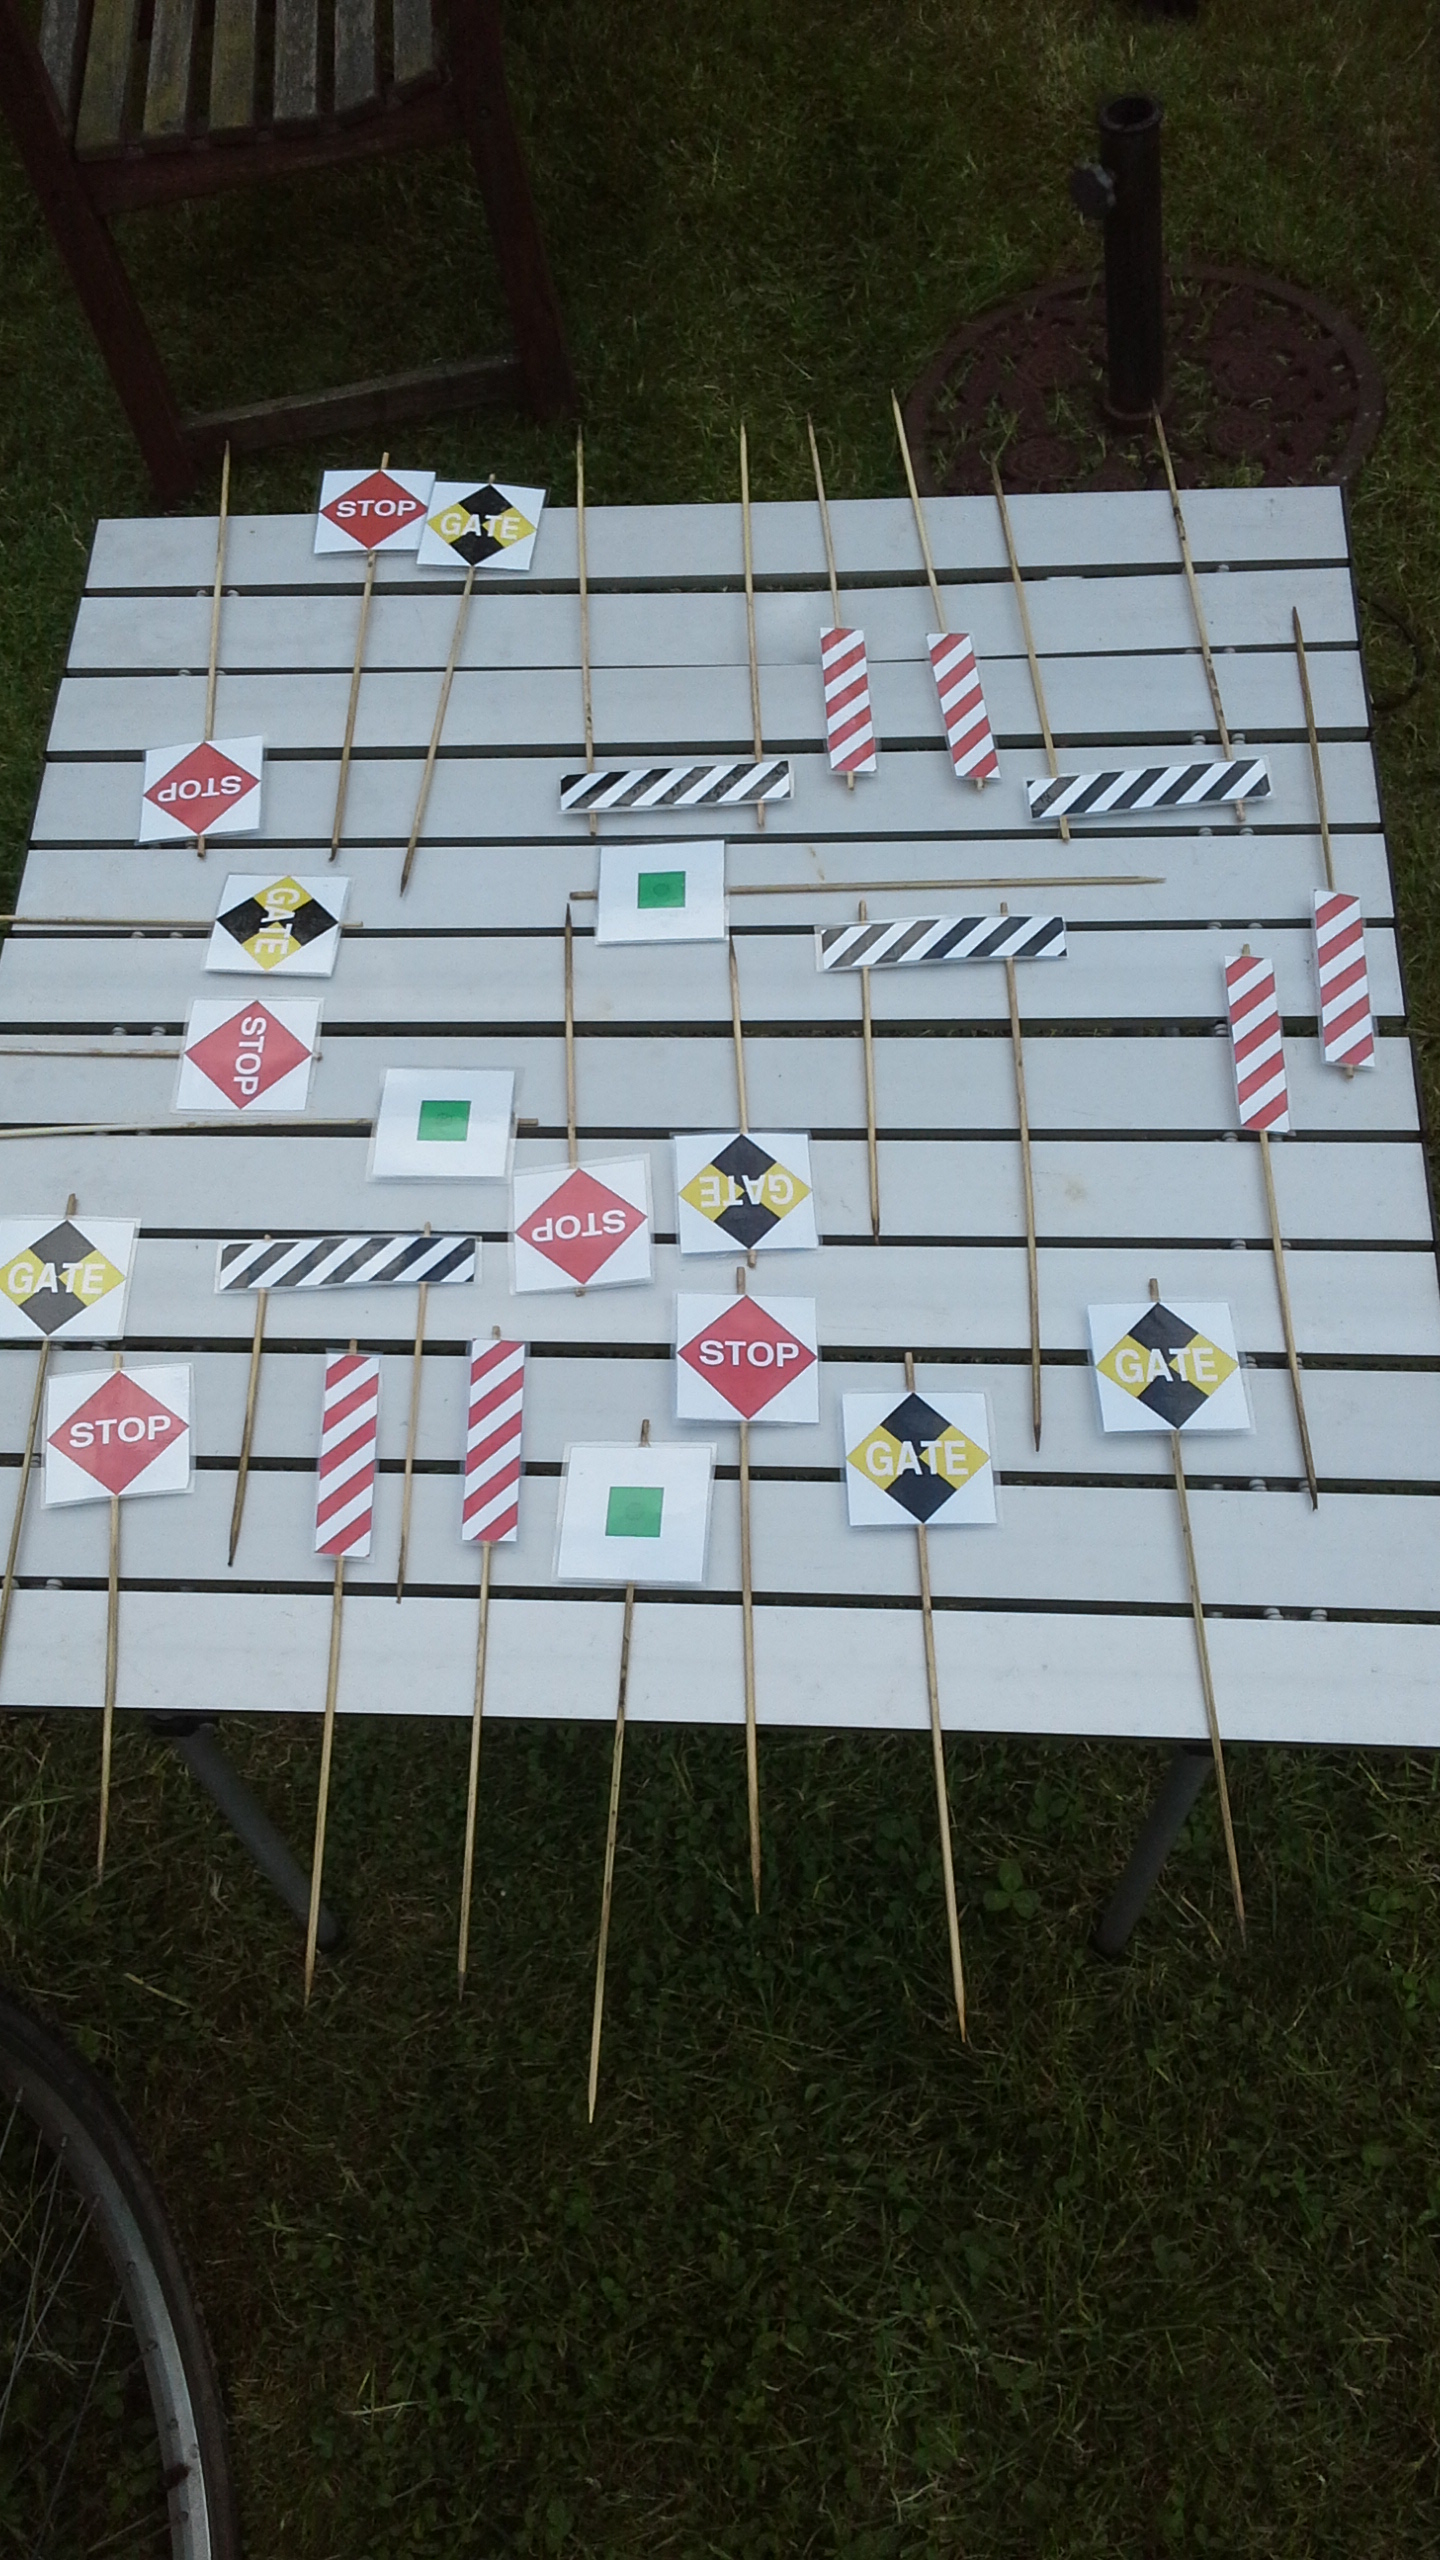
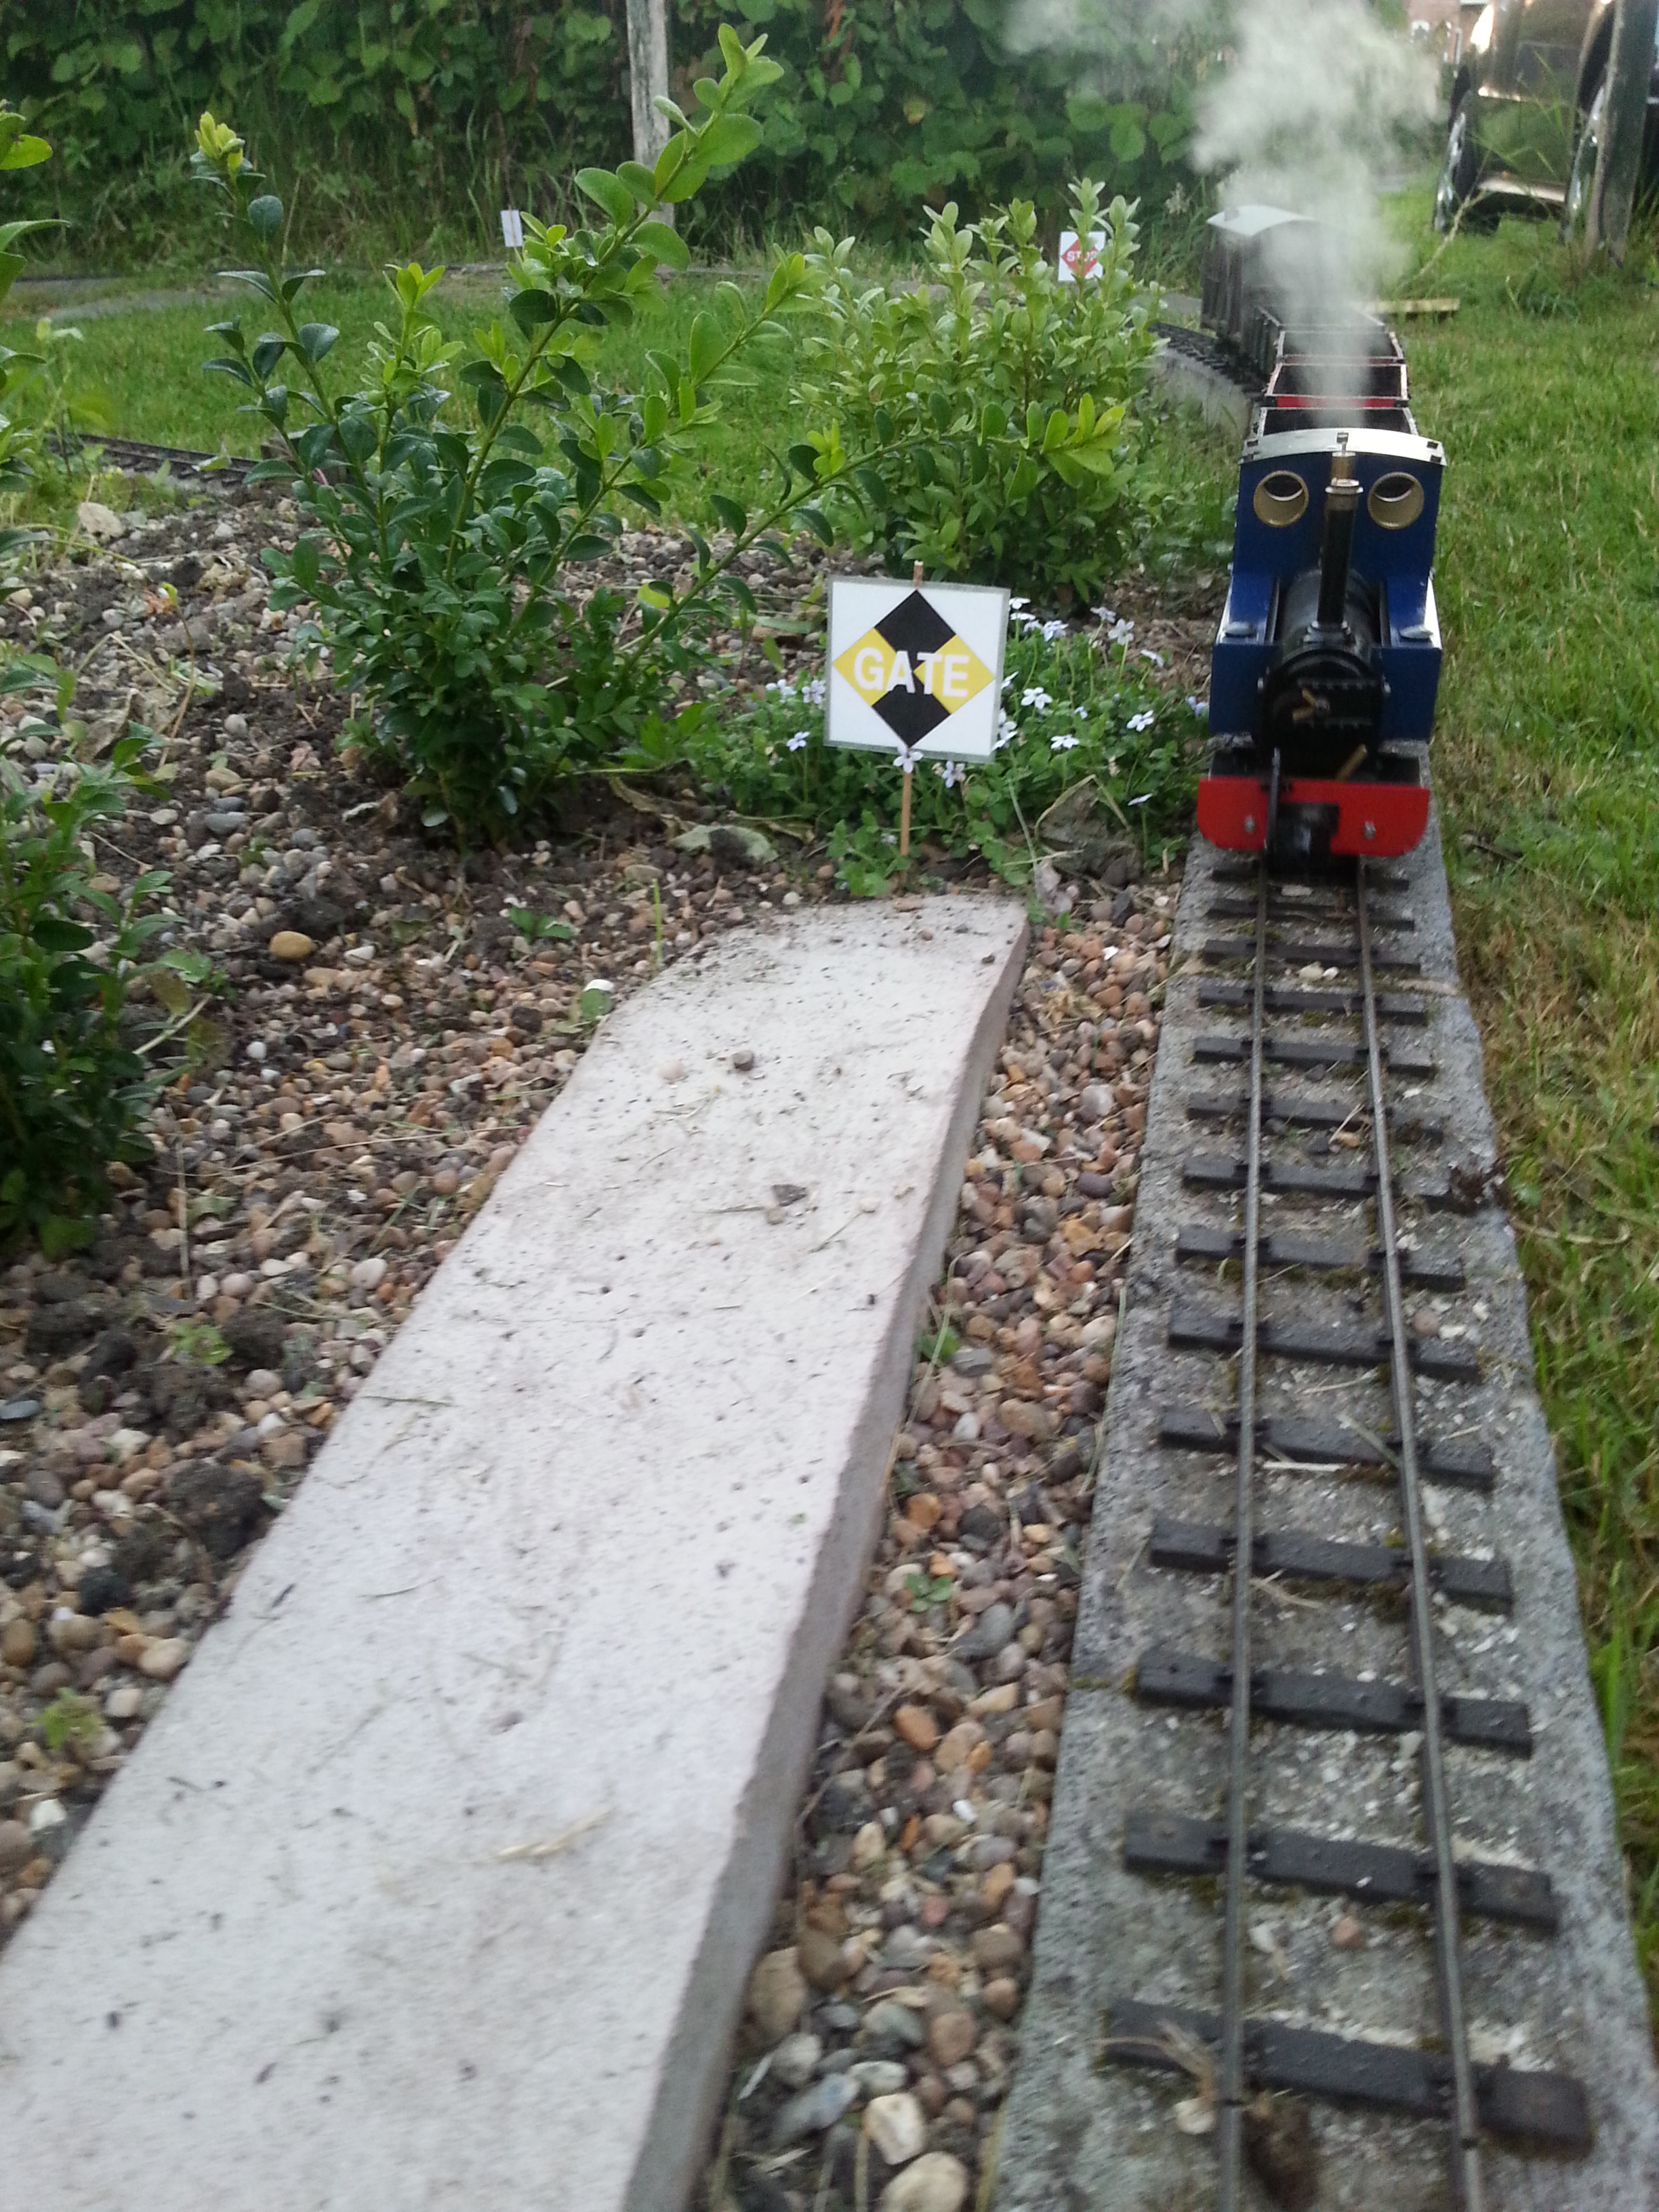
Signs “on the ground” indicating location and label code to help operators.
Integrate passenger and goods workings, thus allowing for the operation of tail traffic, mixed trains and specials at time of heavy demand. This means looking at air brake pipes for a select few wagons.
Most importantly, separate Operations from free-running. Plan and advertise separate “steamups” and “runnings” so each doesn’t get in the other’s way. Each on its own is too much fun to give up, but trying to do both at the same time doesn’t work.